
Practice What You Pin - DIY "Chandelier"
Search
While searching for the next Practice What You Pin project, I realized that though I am not artistically inclined, I do enjoy making things, which led me to a DIY chandelier of sorts. For those in a rental living situation, this is a perfect solution to cover up ugly or boring apartment flush mounts.
I went to Hobby Lobby, walked around for about 45 minutes - there is just so much stuff! - before finally obtaining the FOUR things I went there for.
| What the DIY Called For | What I Actually Bought |
| 12-inch-diameter hanging planter basket | 12-inch decorative basket (I guess flower planters are out of season at the end of October?) |
| silver spray paint | silver spray paint (I wanted to get some sparkly stuff, but decided the garland was sparkly enough) |
| crystal garland | crystal-ish holiday garland (3 strands, 6 feet each) |
| 3 picture hangers |
3 picture hangers (comes in a pack of 4) |
If you decide to make this chandelier any time after summer, good luck finding a hanging planter basket. I had to settle for a decorative basket, which I spray painted silver. However, if you are lucky enough to get one, remove the hanging chains and filler from the basket before painting. I really wanted to use a silver paint that had glitter in it, but once I found the garland, decided that would be overkill. I used a metallic silver spray paint instead. I painted the basket and let it dry overnight. Sorry, no pictures of that since I did it at night, outside, under some outdoor flood lights.
I could tell the garland was going to be a problem as soon as I started wrapping it around the basket. Once I started, I 100% regretted what I had chosen for my DIY. The original blog post called for wire garland. There was no wire garland at Hobby Lobby that I could find, so I grabbed some that was strung together with fishing line. It kept getting tangled and took about 5 minutes to wrap around once. I want to do this again, but I will not be buying this garland. When the cashier called it a “hot mess,” I knew it was going to be problematic, but it was between this $7 holiday garland and some $10 wedding garland that was shorter.


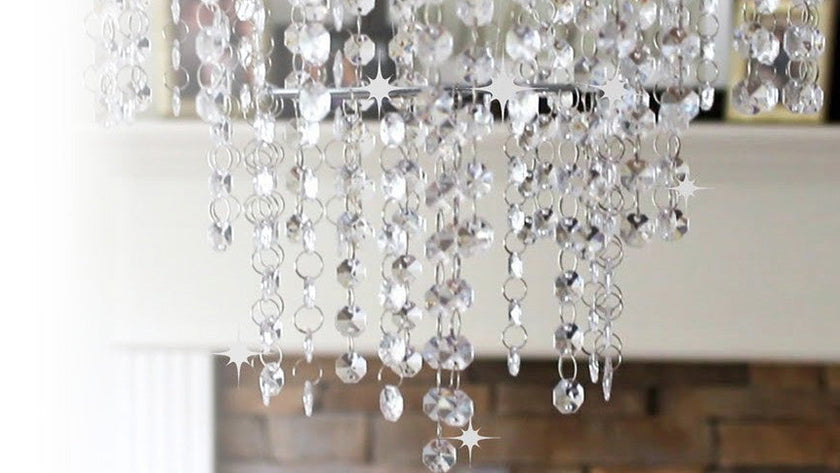
So the garland kept getting tangled, but once I got a system down to mostly keep it away from itself while I was weaving it through the basket, it became pretty easy. But that was only the first string, and it took about 45 minutes. After I developed a system, the second strand took only about 15 minutes. I didn’t use the third garland because there was enough hanging from the original strands to make it look OK (and the bottom of the basket was a star pattern anyway… festive).
The finishing touch was hooking the picture hangers on the sides. I used three of the four in the package, which is what the original project called for.
All in all, I was pretty skeptical of how it was going to turn out at first, given my frustration and the way the garland was, but I think it turned out pretty OK. I will probably hang on to it and take it with me the next time I move.


What did I learn? I would have put a coat of primer on before spray painting had I known that it was going to rub off as I was threading the garland. At least it's on the inside so you can’t see where paint came off. I would also try harder to find the correct kind of garland (wire instead of fishing line); it probably would have made my life easier. Unfortunately, there are no flush mounts in this office to give an illustration of the final feel.
Final score: 8/10. I like the way it turned out.

You can see the original project here: http://www.amandakatherine.com/diy-chandelier/ If you want a less DIY chandelier for your home, check out our guide to buying an entryway chandelier.


Comments